
Plastic modeling enthusiasts often strive for a flawless, professional-grade finish. Combining sandpaper and a polishing compound for plastic models offers a reliable way to achieve this goal. Sanding smooths imperfections and removes surface irregularities, while the polishing compound for plastic models enhances the finish with a high-gloss shine. This technique not only improves the appearance of the model but also adds depth and realism. By mastering this process, hobbyists can elevate the quality of their creations and bring out intricate details that might otherwise go unnoticed.
Key Takeaways
- Begin with rough sandpaper to fix big flaws. Use 400 or 600 grit for good results.
- Wet sanding helps reduce heat and stops dust. It makes sanding smoother and gets the model ready for polishing.
- Use a soft cloth to rub polishing compound in circles. This brings back the model’s shine and removes tiny scratches.
- Check the model under bright light to spot scratches early. Fix them before moving on for a perfect finish.
- Be patient and steady while working. Practicing often will improve your modeling skills over time.
Materials Needed
Creating a smooth and glossy finish on plastic models requires the right tools and materials. Each item plays a specific role in the process, ensuring the best results.
Sandpaper Grits
Sandpaper is essential for smoothing out imperfections on plastic surfaces. A variety of grits is necessary to achieve a professional finish. Start with coarse grits, such as 400 or 600, to remove larger imperfections. Progress to finer grits, like 1000, 1500, or even 2000, for a smoother surface. Using multiple grits ensures a gradual refinement of the plastic, preventing scratches and uneven textures. Wet sanding, which involves dipping the sandpaper in water, can further enhance the results by reducing friction and keeping the surface clean.
Tip: Always test the sandpaper on a small, inconspicuous area of the model to ensure it doesn’t damage the plastic.
Polishing Compound For Plastic Models
A polishing compound for plastic models is crucial for achieving a high-gloss finish. This compound removes fine scratches left by sanding and restores the plastic’s natural shine. Choose a compound specifically designed for plastic to avoid damage. Apply the compound sparingly, using a soft cloth or applicator pad. Work it into the surface with gentle, circular motions. This step not only enhances the appearance but also protects the model from future wear.
Note: Avoid using excessive amounts of the polishing compound for plastic models, as it can leave residue or dull the surface.
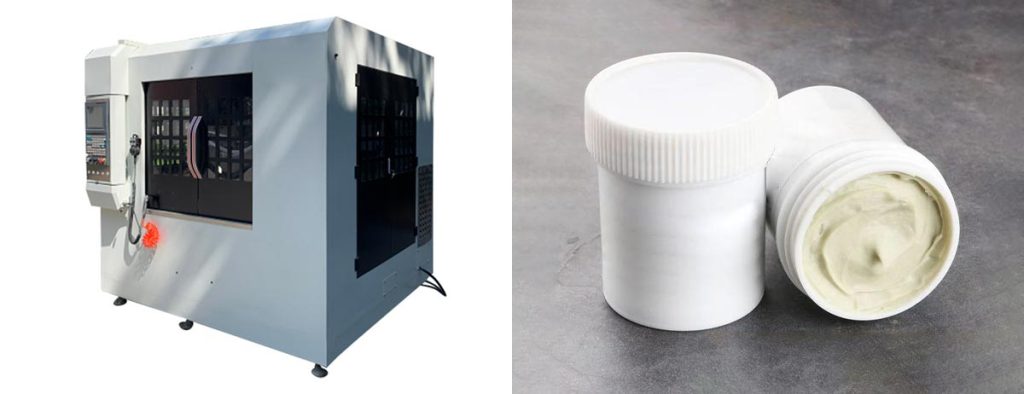
Optional Tools: Plastic Polishing Machine
For those seeking efficiency, a plastic polishing machine can be a valuable tool. These machines automate the polishing process, saving time and effort. They work well with a polishing compound for plastic models, ensuring even application and consistent results. While not essential, they are particularly useful for larger models or those with intricate details. Beginners may prefer manual polishing to maintain control, but experienced hobbyists often appreciate the convenience of a machine.
Reminder: Always follow the manufacturer’s instructions when using a plastic polishing machine to avoid damaging the model.
Preparation
Cleaning the Plastic Model Kit
Before starting the sanding and polishing process, cleaning the plastic model kit is essential. Dust, grease, and residue can interfere with sanding and polishing, leading to uneven results. Use a mild soap solution and a soft sponge to wash the model gently. Rinse thoroughly with clean water to remove any soap residue. Allow the model to air dry completely or use a lint-free cloth to speed up the drying process. For stubborn dirt or grease, consider using isopropyl alcohol on a cotton swab. This step ensures a clean surface, which is crucial for achieving a smooth finish.
Inspecting for Imperfections
After cleaning, inspect the plastic model kit carefully for imperfections. Look for mold lines, scratches, or uneven surfaces that need attention. Use a bright light or magnifying glass to identify small flaws that might not be visible to the naked eye. Mark these areas lightly with a pencil to ensure they are addressed during sanding. This inspection step helps prioritize problem areas and ensures no detail is overlooked. A thorough examination at this stage saves time and effort later in the process.
Setting Up Your Workspace
A well-organized workspace contributes significantly to the success of sanding and polishing. Ensure the area is free of dust and debris to prevent contamination. Secure the plastic model kit firmly to the workbench using clamps to avoid movement during sanding. Good ventilation is essential, especially when working with materials that generate fine dust. Safety should also be a priority. Wear safety glasses to protect your eyes and consider using a dust mask or respirator to avoid inhaling particles. A clean, safe, and well-lit workspace allows for better focus and precision.
Tip: Keep all tools and materials within easy reach to streamline the process and maintain efficiency.
Sanding Process
Achieving a flawless finish on plastic models begins with a well-executed sanding process. This step removes imperfections, smooths the surface, and prepares the model for polishing. Following a systematic approach ensures consistent and professional results.
Starting With Coarse Grit
The sanding process starts with coarse grit sandpaper. This stage focuses on removing significant imperfections, such as mold lines, seams, or scratches. Coarse grits, typically ranging from 60 to 80, are ideal for shaping the surface and eliminating noticeable flaws. Applying light pressure prevents excessive material removal, which could damage the model.
Tip: Always sand in one direction to maintain uniformity and avoid creating uneven textures.
The table below illustrates the role of coarse grit in the overall sanding process:
| Stage | Grit Range | Purpose |
|---|---|---|
| Start with Coarse | 60-80 | Remove material quickly and shape the surface, eliminating imperfections. |
This initial step lays the foundation for a smoother finish in subsequent stages.
Progressing to Fine Grits
After addressing major imperfections, transitioning to finer grits refines the surface. Sandpaper with grits between 120 and 150 reduces scratches left by the coarse grit. Gradually increasing to grits in the 220 to 400 range ensures a smooth and even finish. This progression minimizes the risk of visible scratches and prepares the model for polishing.
Note: Avoid skipping grit levels, as this can leave deeper scratches that are difficult to remove later.
The following table highlights the grit ranges and their purposes during this stage:
| Stage | Grit Range | Purpose |
|---|---|---|
| Gradual Transition | 120-150 | Refine the surface and reduce scratches left by coarse grit. |
| Final Finishing | 220-400 | Achieve a smooth finish for optimal adhesion and appearance. |
Using finer grits ensures the model’s surface is ready for the final polishing steps.
Wet Sanding Techniques
Wet sanding is a technique that enhances the sanding process by reducing friction and preventing dust buildup. Dipping the sandpaper in water or using a spray bottle to moisten the surface creates a smoother sanding experience. This method also helps avoid overheating, which can warp plastic models.
To perform wet sanding effectively:
- Submerge the sandpaper in water for a few seconds.
- Lightly sand the surface in circular motions.
- Wipe away excess water and debris with a lint-free cloth.
Reminder: Change the water frequently to prevent reintroducing debris onto the model’s surface.
Wet sanding is particularly useful when working with finer grits, as it ensures a polished and scratch-free finish. Incorporating this technique into the sanding process maximizes the effectiveness of the sandpaper and prepares the model for the polishing compound.
Polishing Process
Applying Polishing Compound
The polishing process begins with the application of a polishing compound. This step removes fine scratches left by sanding and restores the plastic model’s surface to a smooth, glossy finish. To apply the compound effectively:
- Use a soft, lint-free cloth or an applicator pad.
- Place a small amount of the compound onto the cloth.
- Work the compound into the surface using gentle, circular motions.
Applying too much compound can leave residue, so moderation is key. Focus on one section at a time to ensure even coverage. For intricate areas, use a cotton swab to reach tight corners. This method enhances the model’s appearance and prepares it for the final buffing stage.
Tip: Choose a polishing compound specifically designed for plastic models to avoid damaging the surface.
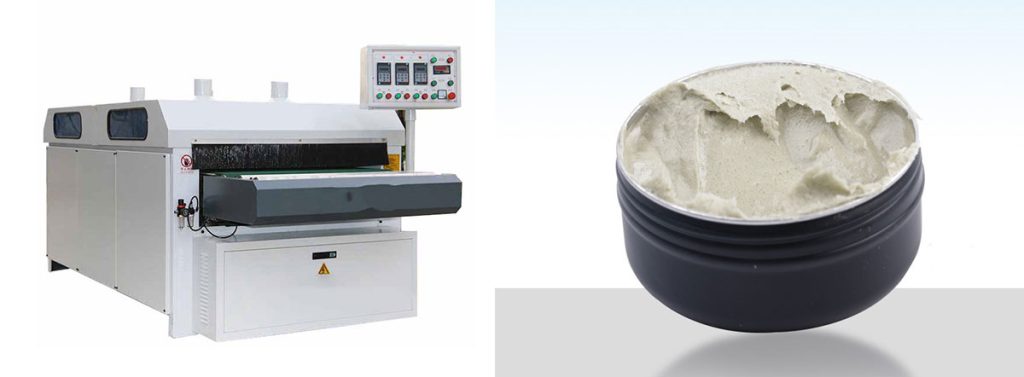
Using a Plastic Polishing Machine
For hobbyists seeking efficiency, a plastic polishing machine offers a faster and more consistent finish. These machines automate the polishing process, making them ideal for larger models or those with complex details. When using a polishing machine:
- Attach a soft polishing pad to the machine.
- Apply a small amount of polishing compound to the pad.
- Move the machine across the surface in slow, overlapping motions.
Mechanical polishing is a widely used method for enhancing the surface finish of plastic models. Techniques like graining and flame polishing are often discussed in technical guides as effective ways to hide tooling marks and improve paint adhesion. Understanding the surface plastic flow mechanisms during polishing ensures the desired results.
Note: Always follow the manufacturer’s instructions to prevent damage to the model. Avoid applying excessive pressure, as this can overheat the plastic and cause warping.
Buffing and Finishing
The final step in the polishing process involves buffing and finishing. Buffing removes any remaining residue from the polishing compound and brings out the model’s high-gloss shine. To buff the surface:
- Use a clean, dry microfiber cloth.
- Gently rub the surface in circular motions.
- Inspect the model under bright light to ensure an even finish.
For resin models, the buffing process is particularly important. Knowing how to polish resin effectively can make a significant difference in the final appearance. Polishing resin requires extra care due to its softer nature compared to plastic. Wet sanding techniques, combined with a suitable polishing compound, can achieve a flawless finish.
Reminder: Change the cloth frequently during buffing to avoid reintroducing residue onto the surface.
By following these steps, hobbyists can achieve a professional-grade finish on their plastic models. Whether working on plastic or resin, mastering these techniques elevates the quality of the final product.
Tips for Best Results
Avoiding Scratches
Scratches can ruin the finish of a plastic model. Preventing them requires careful handling and proper techniques during sanding and polishing. Marking mold lines with a marker pen simplifies sanding by highlighting areas that need attention. Sanding these lines with 600–800 grit sandpaper or a sanding sponge ensures smooth results without damaging the surface. Cleaning the model with wax and grease remover after sanding removes debris and prepares it for polishing.
When wet sanding, avoid edges where scratches are more likely to occur. Using 2000-grit sandpaper followed by 3000-grit minimizes the risk of visible marks. Gentle pressure during sanding prevents deep scratches. For polishing, a microfiber towel works best to avoid introducing new imperfections. These steps ensure a flawless surface ready for a high-gloss finish.
Tip: Always inspect the model under bright light to catch scratches early and address them before moving to the next step.
Achieving A High-Gloss Finish
A high-gloss finish transforms a plastic model into a professional-looking masterpiece. Proper preparation and technique are key. After sanding, applying a clear coat enhances the shine. Start with a light mist for the first coat, allowing it to cure before adding a heavier coat. Wet sanding with fine-grit sandpaper, such as 2000 or 3000, refines the surface further.
Polishing with a strong compound brings out the gloss. Use circular motions with a microfiber towel to achieve an even shine. For clear plastic parts, dipping them in Future Floor Polish (now Pledge) creates a crystal-clear finish. Tweezers help hold the model during dipping, preventing fingerprints. Covering the model with a bowl during drying keeps dust away, ensuring a flawless result.
Note: Avoid brushing or airbrushing clear coats on transparent parts, as this can lead to a grainy finish.
How to Polish Resin Models?
Polishing resin models requires extra care due to their softer nature. Wet sanding is particularly effective for resin, as it reduces friction and prevents overheating. Start with 1000-grit sandpaper and gradually move to finer grits, such as 2000 or 3000. Avoid sanding edges aggressively, as resin is prone to chipping.
After sanding, apply a polishing compound designed for resin. Work it into the surface using gentle, circular motions. Buffing with a microfiber cloth enhances the shine while protecting the delicate material. For intricate details, use a cotton swab to polish tight corners. These techniques ensure a smooth, glossy finish that highlights the model’s features.
Reminder: Resin models often require additional cleaning before polishing to remove any residue from the molding process.
Conclusion
Mastering the art of combining sandpaper and polishing compound transforms plastic models into stunning works of art. The process involves three key steps: preparation, sanding, and polishing. Each step plays a vital role in achieving a smooth, professional-grade finish.
Tip: Consistency and patience during each stage ensure the best results.
This technique enhances the model’s appearance, highlighting intricate details and creating a high-gloss shine. Regular practice sharpens skills and builds confidence. Hobbyists who refine their methods over time will see noticeable improvements in their creations.
Reminder: Every model presents a unique challenge, making each project an opportunity to learn and grow.